Private Historic Sakarya Tour
Ask us about a tailor-made route focused on Ottoman architecture, historic bridges, Geyve, Alifuatpaşa, the National Struggle and Sakarya's cultural heritage.
Request a Custom Tour





In Alifuatpaşa, within Sakarya's Geyve district, one of the region's most fascinating Ottoman monuments still crosses the Sakarya River.
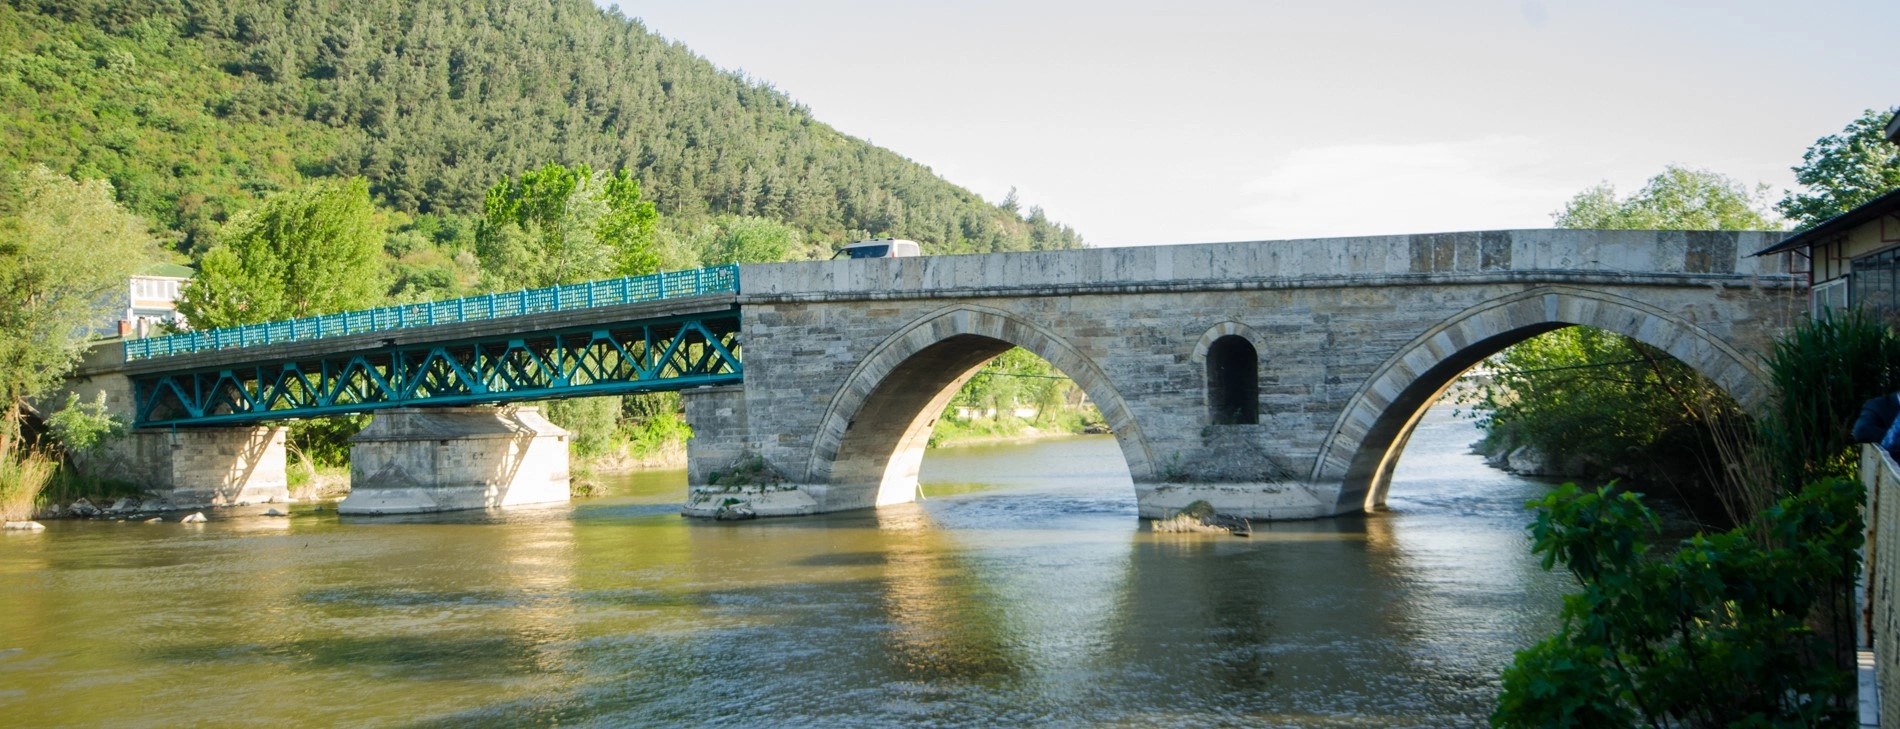
The Bayezid II Bridge, also known as the Alifuatpaşa Bridge or historically as the Geyve Bridge, was commissioned by Ottoman Sultan Bayezid II and completed in 1495.
Built from massive blocks of cut stone, the bridge formed part of an important historic route through northwestern Anatolia, allowing travelers, merchants, officials and military forces to cross one of the country's major rivers.
According to current official information, the bridge was designed by Fakir Abdullah, an architect and engineer associated with Sultan Bayezid II. Its original composition contained 14 arch openings, with larger arches above the river and smaller openings extending across the floodplain.
The bridge has survived floods, earthquakes, changing river conditions and more than five centuries of continuous history. Some original arches were eventually lost and replaced with a visible steel structural section, creating the unusual combination of Ottoman masonry and later engineering seen today.
The bridge is especially rewarding when combined with the nearby Ali Fuat Pasha Kuvâ-yi Milliye Museum , Ali Fuat Cebesoy's memorial and the wider historic landscape of Sakarya Province.
The bridge was commissioned by Ottoman Sultan Bayezid II during the final years of the 15th century.
Its historic design combined major river arches with smaller openings extending across the floodplain.
The bridge created a permanent crossing along one of northwestern Anatolia's most important natural corridors.
Combine the bridge with the Ali Fuat Pasha Museum and other sites connected with Sakarya's history.
Essential information for visiting one of Sakarya's most important surviving Ottoman bridges.
Alifuatpaşa, Geyve district, Sakarya Province.
Open on Google MapsH. 901 / AD 1495.
Ottoman Sultan Bayezid II.
14 arch openings built primarily from cut stone.
Approximately 150 metres in current official visitor information.
Allow approximately 30–45 minutes.
The bridge preserves the story of Ottoman transportation, engineering and regional communication at one of Anatolia's major river crossings.
The importance of the Bayezid II Bridge goes far beyond its age. Its construction created a monumental and dependable crossing over the Sakarya River, a natural barrier that has influenced movement through this region for thousands of years.
During the Ottoman period, roads were essential not only for local travel but also for trade, government communications, tax collection, postal movement, pilgrimage and military campaigns.
A substantial stone bridge at Alifuatpaşa therefore represented a major investment in the infrastructure of the empire.
More than five centuries later, much of that story can still be understood simply by standing beside the river and examining the bridge's arches, stone piers, cutwaters and surviving inscription.
The structure is also remarkable because its appearance records different periods of history. Original Ottoman masonry stands beside later steel repairs, revealing how generations adapted the bridge rather than abandoning it when parts of the historic structure failed.
The bridge's surviving inscription provides the most important evidence for its date.
It records that the crossing was constructed during the reign of Sultan Bayezid II in H. 901, corresponding to 1495–1496.
Bayezid II ruled the Ottoman Empire from 1481 until 1512, a period in which the state continued to consolidate the territories and institutions inherited from his father, Sultan Mehmed II.
Bridges, roads, religious complexes, markets and charitable foundations were all important parts of Ottoman investment in the movement of people and goods across the empire.
The permanent crossing at Geyve served one of the important routes between northwestern Anatolia and the Anatolian interior.
Bayezid II ruled the Ottoman Empire for more than three decades.
The bridge inscription preserves the Islamic calendar date of its construction.
Official Sakarya sources identify this as the bridge's construction year.
Stone bridges formed essential links within the empire's road and communication network.
The structure provided a permanent passage across the powerful Sakarya River.
The bridge has remained part of the Alifuatpaşa landscape for more than 500 years.
Current official tourism information attributes the bridge to Sultan Bayezid II's architect and engineer Fakir Abdullah.
The project required far more than simply placing arches across the central river channel.
The Sakarya River is dynamic, and its valley includes areas affected by changing water levels and seasonal flooding.
The bridge therefore extended across both the main river channel and the surrounding terrain, using a sequence of arches of different sizes.
The resulting structure demonstrates how Ottoman engineers adapted bridge design to the landscape rather than attempting to force a perfectly symmetrical solution onto the river.
The Bayezid II Bridge stood on an important historical route through the Geyve corridor.
The valley offered one of the practical passages between northwestern Anatolia and regions farther inland.
Crossing the Sakarya River safely was therefore crucial for travelers, commercial traffic and state communications.
Official Sakarya tourism publications associate the bridge with the historic long-distance routes that connected the Ottoman capital with the Anatolian interior.
Seen from this perspective, the bridge was not simply a local construction. It belonged to a much larger system of movement that connected towns, markets, military routes and administrative centres.
The surrounding valley created a natural transportation route between northwestern and inland Anatolia.
The bridge allowed travelers to cross the Sakarya without relying entirely on seasonal or temporary crossings.
Reliable bridges helped goods and merchants move more efficiently between regional markets.
Major Ottoman roads also had strategic importance for the movement of soldiers and supplies.
Road infrastructure connected administrative centres across the empire.
The river and narrow geographical corridor still help visitors understand why this crossing mattered.
The bridge was constructed primarily from large blocks of cut stone, creating a substantial masonry structure capable of carrying traffic over the Sakarya River.
Current official descriptions record an original composition of 14 arch openings.
The arches were not all identical. The main river section used larger openings, while nine smaller rounded arches were positioned toward the Alifuatpaşa side.
Official descriptions also identify three surviving pointed arches among the major historic spans.
This changing rhythm of large and small arches is one of the most interesting features of the monument.
Rather than functioning simply as a straight stone wall over the river, the bridge was designed to allow water to pass through multiple openings during changing river conditions.
Large carefully shaped masonry blocks form the principal historic structure.
The original bridge incorporated fourteen arch openings of different sizes.
The principal spans carry the crossing over the active Sakarya River channel.
Nine smaller arches extend across the Alifuatpaşa side of the historic crossing.
Several of the principal surviving masonry openings use pointed Ottoman forms.
Historic stonework now stands beside later steel repairs where original spans were lost.
Current information published by the Sakarya Governorate and Provincial Directorate of Culture and Tourism describes the bridge as approximately 150 metres long.
The historic roadway is listed at approximately 5.60 metres wide.
Stone parapets approximately 35 centimetres wide on each side increase the total external width to around 6.30 metres.
The same official description records parapet walls approximately 1.05 metres high.
Historic inventories and academic studies sometimes give different measurements, reflecting different ways of defining the surviving structure and its approaches. For visitor purposes, the current official tourism measurement of approximately 150 metres is the most useful figure.
One of the most rewarding ways to examine the bridge is to look at the changing size and shape of its arches.
The smaller openings toward the Alifuatpaşa side were not simply decorative. They helped the bridge continue across lower ground while providing additional passages for water.
The larger arches near the centre handled the main river crossing.
Historic descriptions identify four bridge piers within the Sakarya River, emphasising the scale of the engineering challenge.
Not all of the original masonry arches have survived intact. Parts lost during the bridge's long history were later replaced using metal and steel construction.
The bridge piers were shaped to interact with the river current rather than simply resist it as flat walls.
Official architectural descriptions record triangular cutwaters on the upstream side and five-sided forms downstream.
These projecting shapes help divide flowing water around the masonry piers and reduce the direct pressure of the river against the structure.
Such details may appear small when viewed from the bridge deck, but from the riverbank they reveal the practical engineering behind the monument's survival.
The bridge's inscription is one of its most historically important features because it directly records the monument's Ottoman patronage and construction date.
It identifies Sultan Bayezid II and gives the date H. 901, equivalent to 1495–1496.
The principal inscription is associated with a projecting architectural feature on the Geyve side of the bridge.
The carved frame surrounding the inscription is particularly valuable for historians of Ottoman decorative art.
Official descriptions record rûmi, curving vegetal and peony-like motifs within the decorative border, providing a surviving example of late 15th-century Ottoman ornament.
The inscription provides the bridge's historic Islamic calendar date.
The inscription securely places the structure within Bayezid II's reign.
The Ottoman sultan is identified as the patron responsible for the bridge.
Floral and scrolling motifs frame the historic inscription.
The principal inscription feature is located toward the Geyve end of the crossing.
The inscription is the key primary evidence for establishing the bridge's construction date.
Visitors immediately notice that the Bayezid II Bridge is not entirely stone today.
Sections of the original arches were lost during the monument's long history and were subsequently repaired with iron and steel structural elements.
The contrast is visually striking: centuries-old Ottoman masonry meets later industrial engineering within the same functioning bridge.
Official Sakarya sources record that the structure underwent restoration work during the Republican period, including the installation of steel support elements.
For heritage visitors, this should not necessarily be viewed as diminishing the monument. Instead, the later interventions form another layer in the bridge's story, showing the practical attempts made to keep an important crossing in service.
Large areas of the 15th-century cut-stone bridge remain visible today.
Some of the original spans disappeared during the bridge's long history.
Later engineering replaced damaged sections with clearly visible metal structures.
Modern interventions helped preserve the crossing and keep it usable.
The bridge allows visitors to compare Ottoman stone engineering directly with later repair techniques.
The bridge has continued to serve transportation needs rather than becoming an isolated ruin.
The importance of this crossing appears to predate the surviving Bayezid II Bridge.
Official Sakarya heritage information reports the remains of an earlier bridge north of the Ottoman structure, on or near an island within the river.
These remains have traditionally been associated with the Byzantine period.
Their presence reinforces the broader geographical importance of this part of the Sakarya valley: the same landscape required river crossings long before the surviving Ottoman bridge was built in 1495.
Visitors should treat these remains as archaeological heritage and observe them only from safe, permitted areas.
Understanding the bridge requires understanding the Sakarya River.
The river is one of Türkiye's major waterways and has shaped settlement, agriculture, transportation and military geography across northwestern Anatolia.
At Alifuatpaşa, the bridge transforms the river from a natural barrier into a route.
Standing beside the historic arches also makes the engineering much easier to appreciate. The bridge had to accommodate not only the normal channel but also changing water conditions and the broader river environment.
This relationship between architecture and landscape is one of the principal reasons the site is worth experiencing in person.
Study the surviving masonry spans and the different forms used across the river and floodplain.
Look for the historic inscription that provides the bridge's construction date and patronage.
The inscription surround preserves an important example of late 15th-century Ottoman ornament.
Observe the shaped projections around the piers that help direct river water around the masonry.
The later steel section creates a dramatic contrast with the surviving Ottoman stonework.
Step away from the bridge itself to appreciate the structure within its river and mountain landscape.
The nearby museum adds an entirely different historical period to the same Alifuatpaşa visit.
The surrounding town gives the monument a lived-in setting rather than the feeling of an isolated archaeological site.
The Bayezid II Bridge is very different from visiting a museum or archaeological site with a controlled entrance.
It remains part of the living landscape of Alifuatpaşa and is currently described by official tourism information as open to traffic.
That means visitors should experience it as both a historic monument and an active crossing.
Walk carefully, pay attention to vehicles and spend time viewing the bridge from the surrounding area rather than focusing only on crossing from one end to the other.
The most interesting experience comes from looking at the bridge from several angles: the roadway, the riverbank, the main arches and the later steel section all reveal different aspects of the monument's history.
Enough for a brief stop, quick photographs and a first look at the main arches.
A comfortable visit for walking across or beside the bridge and viewing the principal architectural features.
Our preferred amount of time if you want to photograph the bridge and study its arches, inscription and river setting.
Ideal for visitors with a particular interest in Ottoman architecture and historic engineering.
Combine the bridge with the nearby Ali Fuat Pasha Kuvâ-yi Milliye Museum and Ali Fuat Cebesoy memorial.
Add Geyve and other historical stops before continuing toward Taraklı.
The bridge is an outdoor monument and can be appreciated throughout the year.
Spring and autumn usually provide the most comfortable conditions for combining the bridge with longer exploration around Geyve and Alifuatpaşa.
Because the character and level of the Sakarya River can change considerably with weather and seasonal conditions, the appearance of the site can also vary throughout the year.
Green landscapes and generally mild conditions make spring excellent for exploring the wider Geyve valley.
Visit earlier or later in the day if you prefer to avoid the strongest midday heat.
Comfortable temperatures and changing vegetation can create beautiful river scenery.
The bridge remains historically rewarding, although wet or icy conditions may require extra care.
Quieter light and softer conditions can be attractive for architecture and river photography.
Lower-angle light can emphasize the texture of the stone arches and surrounding landscape.
The Bayezid II Bridge is one of southern Sakarya's most distinctive subjects for architectural photography.
The contrast between historic stone arches and the later steel section creates compositions that immediately communicate the monument's long history.
Wide views from the surrounding area can include the bridge, Sakarya River and wooded hills, while closer photographs can focus on masonry, arches, cutwaters and architectural details.
Move away from the structure where safe to capture several arches and the river in a single composition.
Side views reveal the form, scale and changing rhythm of the historic masonry openings.
Frame the Ottoman masonry beside the later metal span to illustrate the bridge's changing history.
Calmer water conditions can create attractive reflections beneath the surviving arches.
Look for masonry joints, parapets, the inscription area and shaped bridge piers.
Never step unexpectedly into the vehicle lane or block the crossing for photographs.
The Bayezid II Bridge is an outdoor historic structure rather than a ticketed archaeological site.
There is therefore no standard museum entrance fee or conventional opening schedule for viewing the bridge.
Current official provincial tourism information describes the road access as asphalt and states that the bridge can be reached throughout the four seasons.
The same source currently lists the bridge as open to traffic, so pedestrians should remain alert while crossing or photographing the structure.
The monument remains a functioning historic crossing rather than a modern visitor attraction designed specifically for accessibility.
The roadway is relatively level compared with many archaeological sites, but traffic, historic surfaces, approach conditions and limited pedestrian space may create difficulties for some visitors.
Anyone requiring step-free access or additional assistance should assess current conditions before travelling.
The bridge deck is a functional route rather than a specially surfaced visitor path.
Current official information lists the bridge as open to traffic, requiring extra pedestrian awareness.
Surrounding ground may be uneven and can become muddy or slippery after rain.
Do not assume seating or dedicated visitor facilities are available directly on the bridge.
Visitors with reduced mobility may prefer to appreciate the monument from accessible viewpoints near the approaches.
Local traffic and restoration arrangements can affect the most convenient access point.
The bridge is located in Alifuatpaşa, within the Geyve district of Sakarya Province.
It crosses the Sakarya River within the historic Alifuatpaşa area and is one of the town's most recognisable landmarks.
A private vehicle is especially convenient for travelers planning to combine the bridge with Geyve, Taraklı or other attractions across southern Sakarya.
When using navigation, search for “II. Bayezid Köprüsü, Alifuatpaşa, Geyve” rather than simply entering Geyve.
The bridge lies directly within the historic settlement on the Sakarya River.
Alifuatpaşa forms part of Sakarya's Geyve district in the southern section of the province.
The most flexible option for combining several historical and natural attractions in one day.
Local transport options may connect Alifuatpaşa with Geyve and the wider Sakarya area.
Use the full bridge name together with Alifuatpaşa and Geyve for the most precise search.
The Ali Fuat Pasha Kuvâ-yi Milliye Museum is one of the easiest historical sites to combine with the bridge.
Begin with a wide view of the Bayezid II Bridge from a safe position near the river. This makes it easier to understand the relationship between the crossing and the Sakarya River.
Next, look closely at the surviving stone arches and bridge piers, noticing how their sizes change across the structure.
Continue toward the inscription area and architectural feature on the Geyve side, where the bridge's 15th-century history is recorded in stone.
Notice the later steel section as well. It is an important part of the modern history of the monument and demonstrates how damaged spans were kept in service.
After the bridge, continue to the nearby Ali Fuat Pasha Kuvâ-yi Milliye Museum and the memorial area connected with Ali Fuat Cebesoy.
If you have more time, continue through Geyve and then toward Taraklı for a full historical route through southern Sakarya.
The bridge is ideally positioned for a historical route through southern Sakarya. See our complete Sakarya visitor guide for more destinations.
Explore the story of Ali Fuat Cebesoy, the Kuvâ-yi Milliye and Sakarya's role during the Turkish National Struggle.
Continue to one of Sakarya's most atmospheric historic towns, known for traditional Ottoman houses, narrow streets and heritage architecture.
Combine Ottoman history with forests, rocky scenery and one of Sakarya's most attractive waterfall landscapes.
Relax beside one of Sakarya's best-known natural landmarks, with mountain scenery, waterside walks and panoramic lake views.
Compare Ottoman bridge engineering with one of Anatolia's great surviving Early Byzantine river-crossing monuments.
Explore the district centre, local landscapes and the fertile valley that surrounds this historic Sakarya crossing.
The bridge is located in Alifuatpaşa, Geyve, Sakarya Province, crossing the Sakarya River.
It is also commonly known as the Alifuatpaşa Bridge and has historically been associated with the name Geyve Bridge.
Its inscription dates the bridge to H. 901 / AD 1495–1496.
The bridge was commissioned by Ottoman Sultan Bayezid II.
Current official Sakarya tourism information attributes its design to Fakir Abdullah, an architect and engineer associated with Bayezid II.
Built in 1495, the bridge has stood beside the Sakarya River for more than five centuries.
Current Sakarya Governorate and provincial tourism information describes the bridge as approximately 150 metres long. Historic inventories may use different measurements.
The historic roadway is listed at approximately 5.60 metres wide, with an overall external width of around 6.30 metres including the parapets.
Official descriptions record 14 original arch openings of different sizes. Some historic spans were subsequently lost and replaced with metal construction.
Some original masonry spans were damaged or lost during the bridge's long history. Later restoration work used steel structural sections to maintain the crossing.
The inscription directly records Sultan Bayezid II and the construction date H. 901 / 1495–1496, making it essential evidence for the history of the monument.
Yes. Its carved surround includes historic Ottoman vegetal ornament, including scrolling, rûmi and floral motifs.
These are cutwaters. They help divide the river current around the bridge piers and reduce direct water pressure against the masonry.
Yes. It is an outdoor historic bridge rather than a conventional ticketed monument, and there is no standard entrance fee.
There are no normal museum-style opening hours. Current official tourism information describes the bridge as accessible throughout the year, subject to local traffic, maintenance or restoration arrangements.
Current official provincial tourism information lists the bridge as open to traffic. Always follow current signs and local traffic arrangements.
The bridge can be explored on foot where current conditions permit, but visitors should remain highly aware of vehicle traffic and avoid obstructing the roadway.
Allow approximately 30–45 minutes to see the principal architectural features, take photographs and appreciate the river setting.
Yes, especially for travelers interested in Ottoman architecture, engineering, historic roads and photography.
Official local heritage information records ruins north of the Bayezid II Bridge that are traditionally associated with an earlier Byzantine-period crossing.
Yes. The Ali Fuat Pasha Kuvâ-yi Milliye Museum is one of the best sites to combine with the bridge.
Yes. Taraklı makes an excellent additional stop for a wider historical route through southern Sakarya.
Yes. Official tourism information describes the bridge as accessible in all four seasons, although weather, river conditions or maintenance work can occasionally affect the experience.
The Bridge of Justinian offers a fascinating comparison, allowing visitors to see major Byzantine and Ottoman bridge engineering within the same province.
Do not carve, scratch, paint or attach anything to the historic masonry.
Avoid climbing parapets, arches or bridge piers for photographs.
The bridge is currently an active crossing, so remain alert to vehicles at all times.
Never leave litter on the bridge, riverbank or surrounding landscape.
The Sakarya River can be powerful; never approach unstable or flooded areas for photographs.
Historic carved surfaces are vulnerable to wear and should be observed without physical contact.
Never cross barriers or enter sections closed for maintenance or conservation.
Enjoy Alifuatpaşa as a living community and respect local residents while exploring the monument.
Combine the Bayezid II Bridge, Ottoman heritage, National Struggle history, traditional towns and Sakarya's natural landscapes through a private route designed around your interests.
Explore more than five centuries of history in Alifuatpaşa or create a wider journey combining Geyve, Taraklı, historic bridges, museums, Sapanca and other important destinations throughout Sakarya.
Ask us about a tailor-made route focused on Ottoman architecture, historic bridges, Geyve, Alifuatpaşa, the National Struggle and Sakarya's cultural heritage.
Request a Custom Tour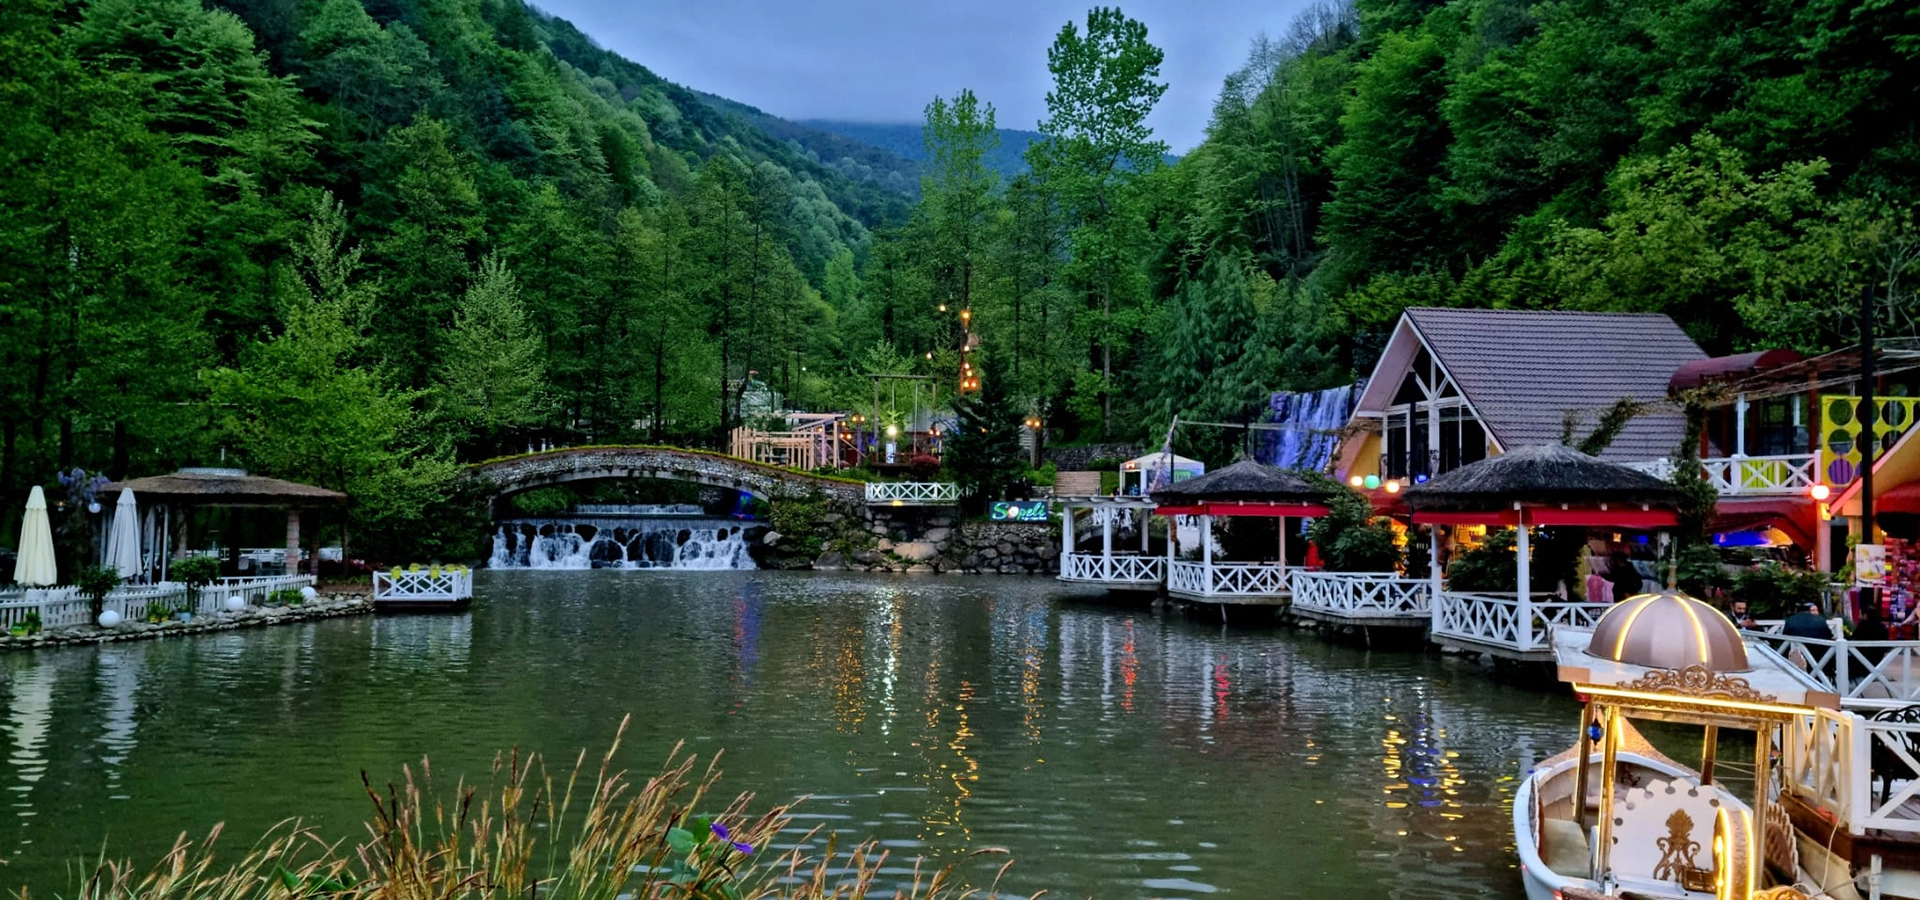
Discover Ottoman monuments, Byzantine bridges, museums, historic towns, lakes, rivers, waterfalls, forests and Black Sea landscapes throughout Sakarya Province.
View Sakarya GuideConnect the Bayezid II Bridge with more of Sakarya's historical and natural destinations.
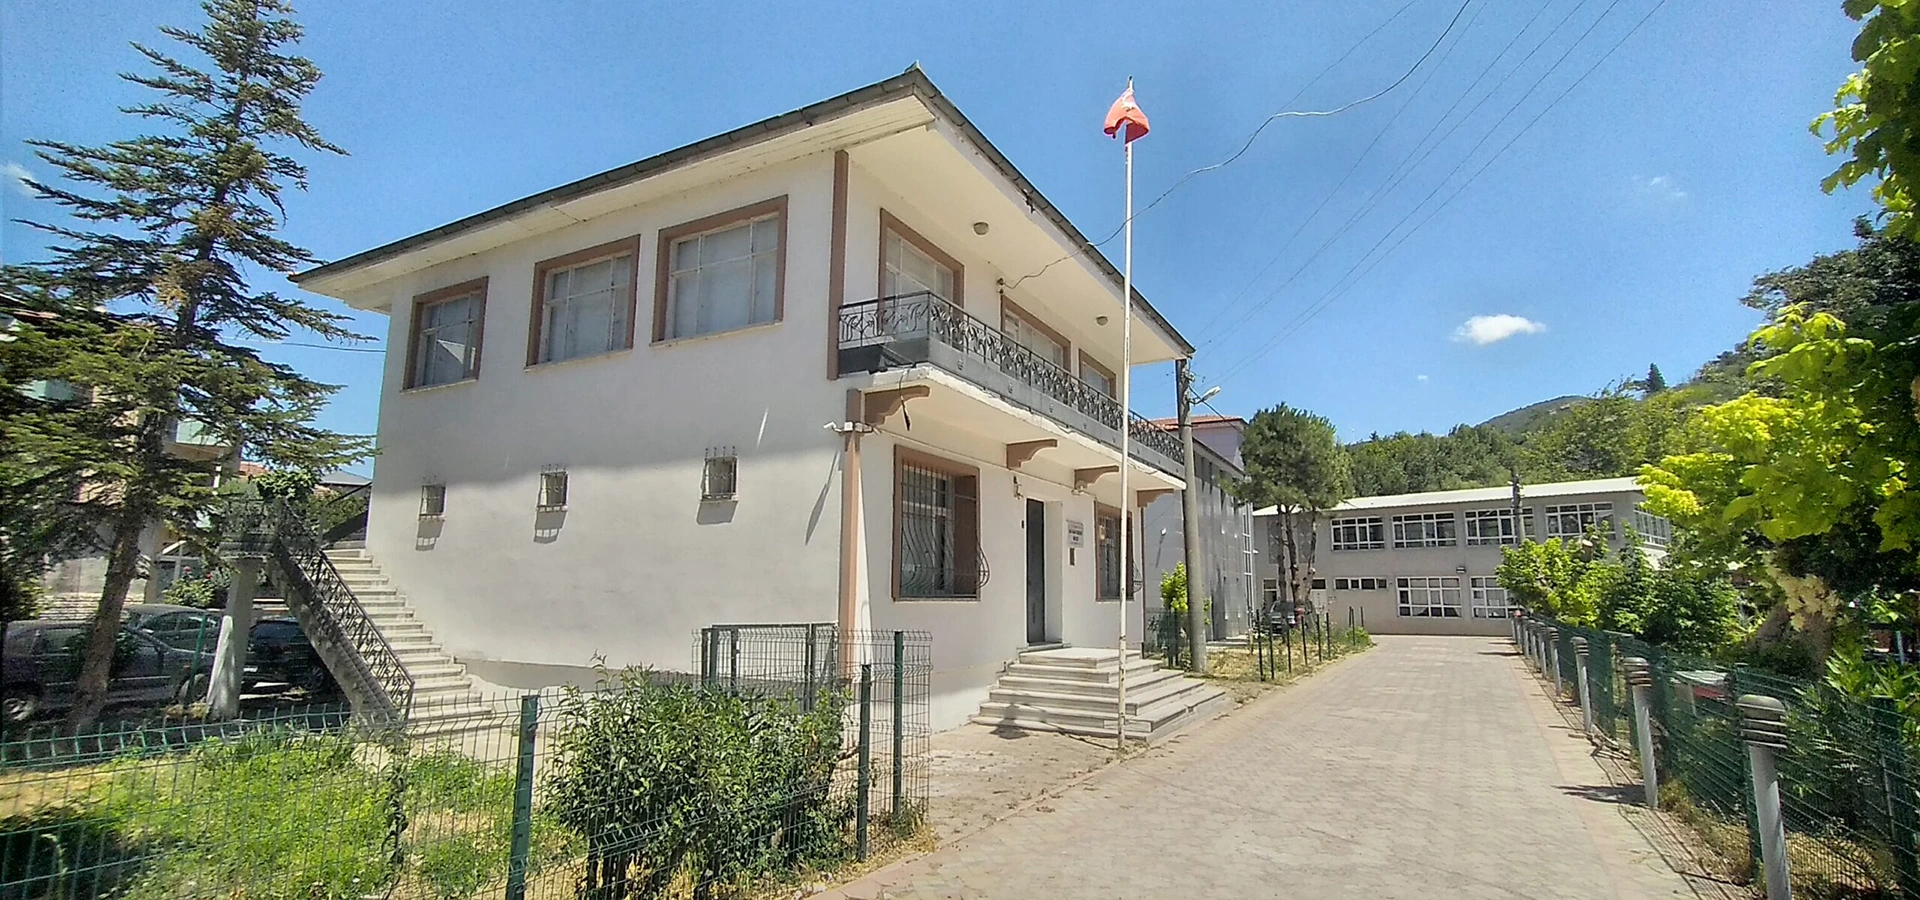
Continue the Alifuatpaşa story with Ali Fuat Cebesoy, the Kuvâ-yi Milliye and the Turkish National Struggle.
Explore the Museum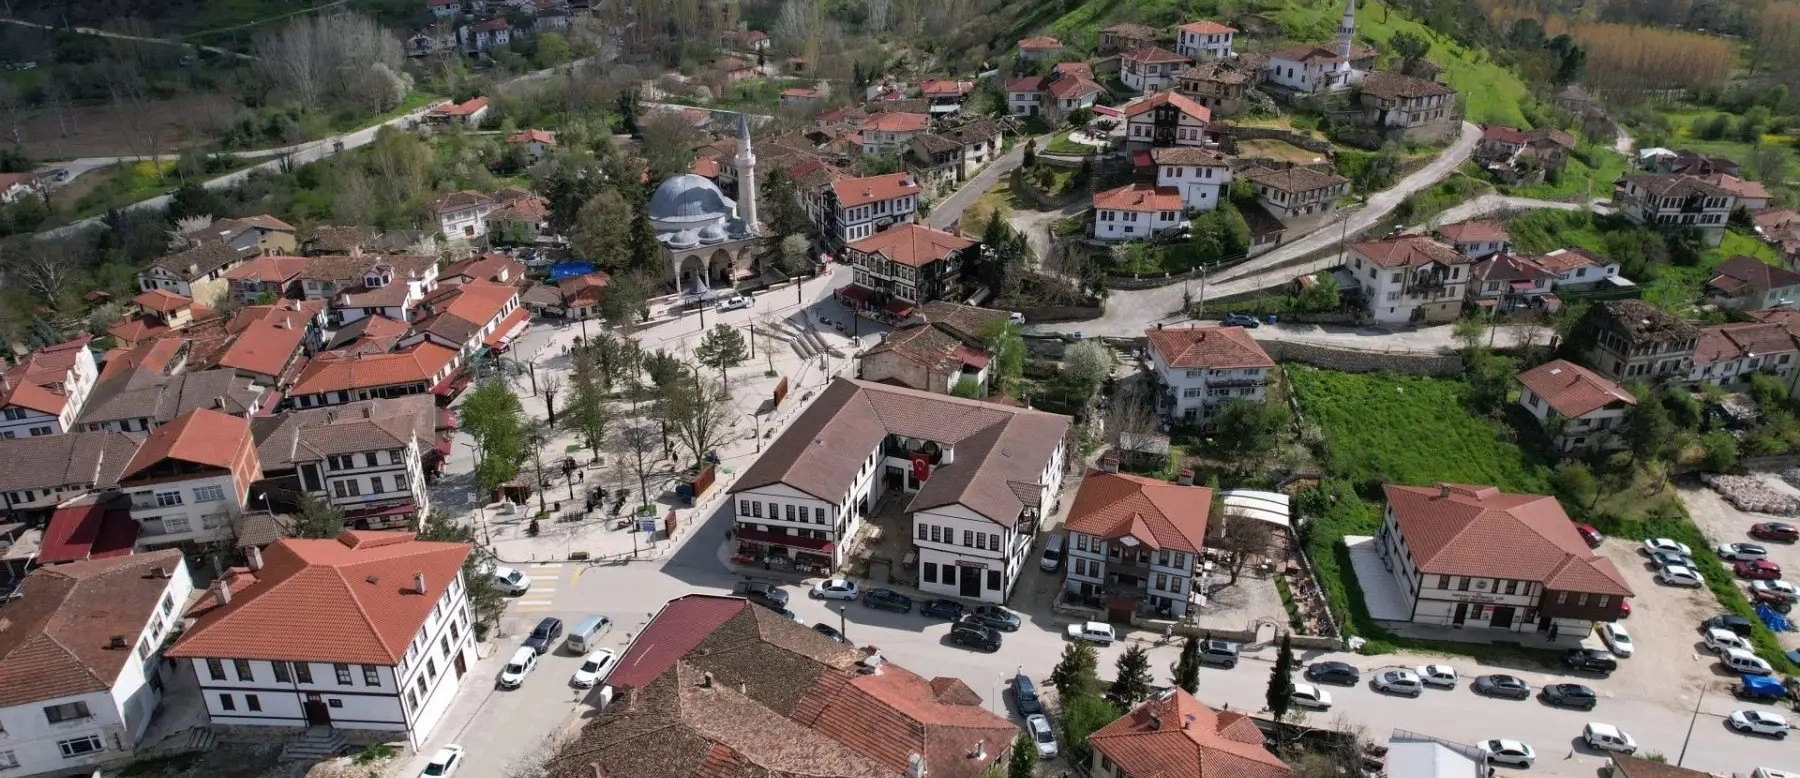
Continue into one of Sakarya's best-preserved historic towns, with Ottoman houses, traditional streets and a peaceful old-town atmosphere.
Explore Taraklı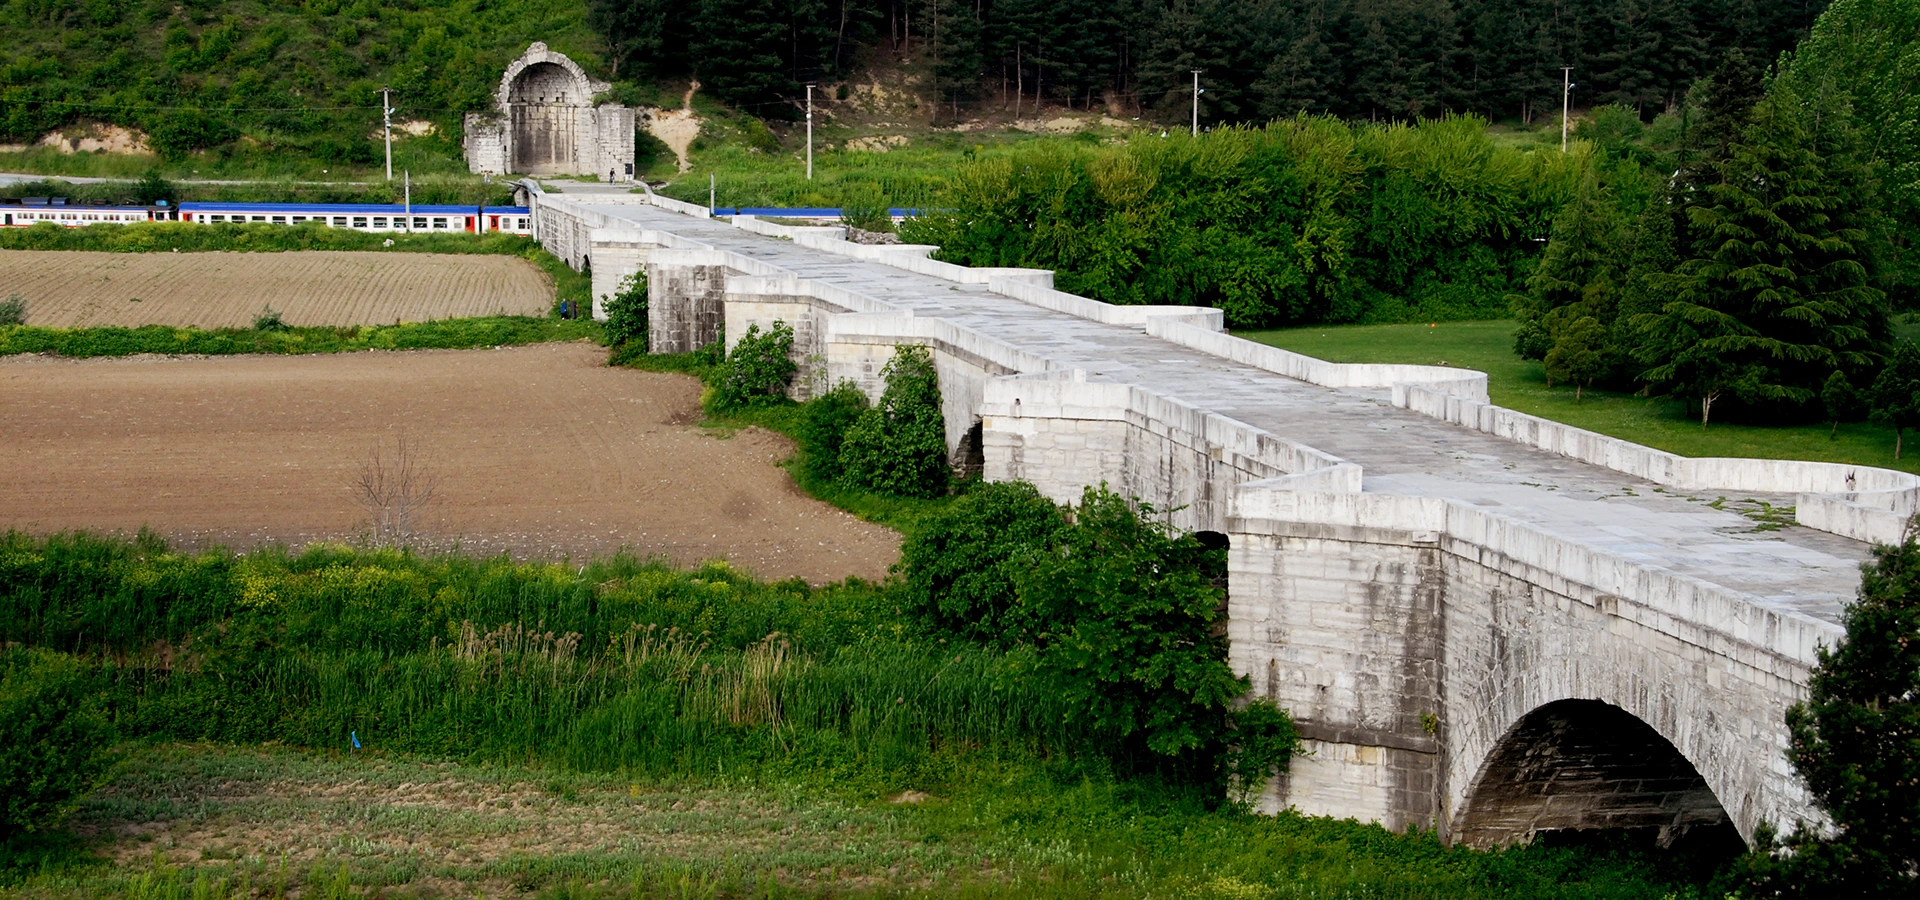
Compare Ottoman engineering with one of Anatolia's remarkable surviving Early Byzantine bridge monuments.
Explore the Bridge